- Details
- Written by Super User
- Category: Latest
- Published: 12 May 2013
- Hits: 7776
- #s5_header_area1
- #s5_top_row1_area1
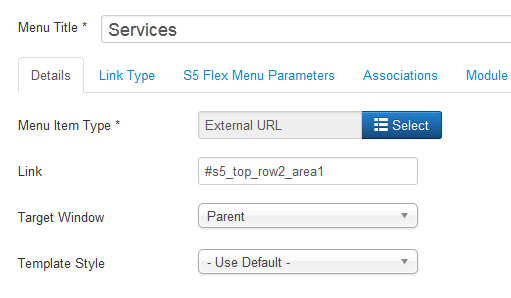
- #s5_top_row2_area1
- #s5_top_row3_area1
- #s5_center_area1
- #s5_bottom_row1_area1
- #s5_bottom_row2_area1
- #s5_bottom_row3_area1
- #s5_footer_area1
Screenshot of admin area of an external menu item with DIV reference entered:

- Details
- Written by Super User
- Category: Latest
- Published: 12 May 2013
- Hits: 8937
Alternatively, you can fill out your own custom urls just below these fields in the template configuration if you do not want to use the default Joomla login and registration pages.

- Details
- Written by Super User
- Category: Latest
- Published: 12 May 2013
- Hits: 6867
Setup is very easy! By default this script is disabled, in order to enable it simply choose All Images or Individual Images from the drop down, as shown below from inside the template configuration page.

All images will load every standard image on the page with lazy load. There is no extra configuration or extra code to add with this configuration, it will just happen automatically. Individual images would be used if you want only certain images to load with this script and not all of them. To do this simply add class="s5_lazyload" to the image like so:
<img class="s5_lazyload" src="http://www.yoursite.com/image.jpg"></img>
This script is compatible with Firefox3+, IE8+, Chrome14+, Safari5.05+, Opera 11.11+
See the script in action:


- Details
- Written by Super User
- Category: Latest
- Published: 12 May 2013
- Hits: 13679
- Download the installation package from our download section.
- Once the download is complete go to the backend of Joomla.
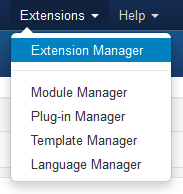
- Navigate through your menu system to Extensions/Extensions Manager.

- Once at the installation screen click the browse button and navigate to where you downloaded the template file.
- Once you have the file selected click 'Upload File and Install'
- Navigate through your menu system to Extensions/Template Manager.
- Find the radio button next to the newly installed template.
- Click on the Default button at the top right of the screen and you're done!

The template is now installed, now let's set it as the default template:

- Details
- Written by Super User
- Category: Latest
- Published: 12 May 2013
- Hits: 10258


I like what I see! I want to JOIN TODAY.


